
I have a new toy... and I think it might be my most favorite of the year so far
Its a jar of 'Gel Medium'..Im sure all my next posts will be filled with experiments of artistsic pleasure with the odd disaster thrown in!
So here today Im goimg to show you how to use it for basic white fabric pictures. You can get this stuff anywhere they sell artists mediums, like if you were an oil painter it would be on the same shelves as you oil painting stuff somewhere!
You will need gel medium, fabric, paintbrush and I use a roller but your hand is fine...

First thing, select your photos and go photocopy them, you cant use inkjet printer prints with this stuff, it bleeds, so if you have a flash carbon printer your away, otherwise your like me and pop down to the shop and do it, I have blown my pictures up so they are A4.

Cut picture to size and paint with the medium, also paint the fabric with the medium too,,,if you dont the fabric can absorb the gel too fast and not take your picture with it.....

Put the picture face down and smooth flat, ahh I forgot, if you have writing it will have to be reversed as all the prints come out opposites of what the original picture is...

If I hold it up to the sun I can see my picture thru the material..Yay!

Ohh look I finally have a caterpillar on my swan plant, this will be a monarch butterfly xxx eeehemmm!

and while Im playing Munchy has been to the chickens and returned with eggs to degorate with felts and stickers! Yay!! eeehhheemm!

Sorry, so much going on here..so when you have done all your pictures let them dry over night, or in the sun till they are bone dry...

Next day lay them on a surface like a bench or I use a glass chopping board, wet both sides, fabric and paper and rub your rag around until the paper starts to pull off and make little balls, if it takes too long just scrape your nails around on it to get it started....

and rub!!!!! as in you will be rubbing for quite a while, these 4 pictures took me till 12 so about 1 hour each, but they were big.. So just keep rubbing till all the papers gone...

like so, but alas you feel you are there and your not because it will dry and look all ghosty because the paper is still there...

so you can see that I have rubbed the left completely but not the right, just keep goign, its worth it..

I had a constant rotation hanging drying by the fire...

After a week of hating the sight of them you will want to make something, so Im making cushions, I choose fabrics and ribbons...

Tropicana Duck Hunter!

Tuscan Fairy Chef...

and Frilly Girly Girl

Here are my finished cushions, very fast!...

You just cut a square and sew on the photo and because its fabric it sews beautifully, then go round and round with edgings and lace...The back is two bits of fabric overlapped, Im sure there is a name for it??

If you make all the ends eventuate in the same corner you dont even have to finish nicely, just let it all hang down and add a few bows, did I mention fast!!!

as in please dont look too close at my sewing fast!

I love this one, I dyed this silk back in 98...

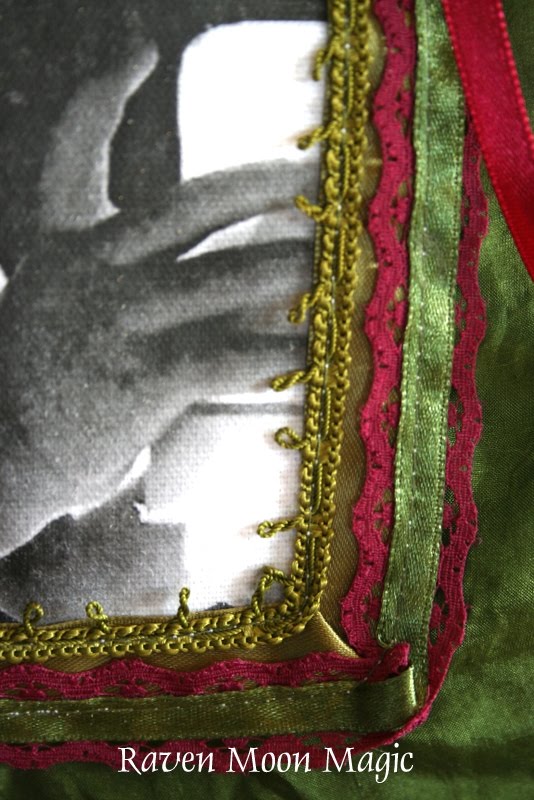
this is my favorite edging, I use this olive stuff wherever I can!...its the best frame..
and this is my brothers daughter Lauren, I made this cushion with fabric that was our Nana's so thats her great Nana, hopefully she likes it when she gets it as a present today...

this frilly lace looks better in multiple layers of different colours...

and someone loves theyre new pillows, she treats them like little TV screens all lined up...

SO there you have project #1
If Im vague on anything or have rushed the tutorial please ask questions!!
have a wonderful day
xxx
Sheree
Beautiful tutorial and I love to see your little daughter in your posting. Some day, this will be a valuable heirloom for her to remember you by. I hope you are having your blogs printed into books. They are all so special.
ReplyDeleteWOW - these are gorgeous, Sheree! You make image transfers look so very easy. I tried it once, and it look me about six different attempts before I finally figured out what I was doing! LOL It involved a much different method, and I think I prefer yours. :) The cushions are all so pretty - no wonder Munchy adores them. And I'm sure your brother's little girl will love hers, too. Very frilly and so cute! Take care, Theresa
ReplyDeleteWhat fun!! That Munchie is a hoot! Thanks for the tutorial. It was perfectly clear and inspiring!!
ReplyDeleteHave a great day!!
xx, Carol
Oooh Sheree these are great! I need some gel medium... right now! How did you figure this very cool process out you clever wee thing? :) might have to have a go I think
ReplyDeleteI thought 'Gel Medium' was something that you put in your hair for a seance....but your tutorial makes me understand otherwise! I love the word 'eventuate'- its brilliantly perfect! And the tutorial is excellent. What a lovely idea for all sorts of memorable presents!
ReplyDeleteOk, the list of things you inspire me with grows and grows! Paperback art...check, Fairy furniture...check....still on the list, hot glue fabric stamp & now, photo transfers (wanted to try this anyway, but you make it look quite manageable!)...this is just the simplified version of a very long list...lol :O)
ReplyDeleteThanks so much!
Great...just what I needed...something new to get involved with...as if I needed another project! ha ha...well really Sheree...you are very good at playing around with new things...thx for the info...and moss/olive is my favorite color as well...Juner
ReplyDelete